![]()
Beautiful Plants For Your Interior

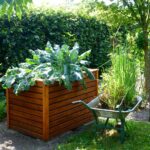
If you’re a gardening enthusiast with limited space or mobility challenges, a Keter elevated garden bed can be the perfect solution. These innovative and practical garden beds offer a raised planting area that eliminates the need for bending or kneeling, making gardening tasks more accessible and enjoyable.
Whether you’re a beginner or an experienced gardener, learning how to use a Keter elevated garden bed effectively is key to creating a thriving garden in your own backyard. Keter elevated garden beds are a great way to start gardening, even if you don’t have a lot of space. They’re also a great option for people who have back problems or other physical limitations that make it difficult to bend over and garden in traditional raised beds.
We’ll explain how to use a Keter elevated garden bed in this guide. Everything from selecting the ideal bed to planting your seeds and vegetables will be covered.
Elevated garden beds are a popular choice for gardening enthusiasts, and Keter elevated garden beds offer several advantages over traditional ground-level gardens. Here are some key benefits of using a Keter elevated garden bed:
Elevated garden beds are an excellent solution for gardening enthusiasts with limited space or mobility challenges. Keter, a renowned brand in outdoor furniture and storage solutions, offers a range of high-quality elevated garden beds. Here are the essential steps to help you create a thriving garden in your own backyard.
There are a few things to keep in mind when choosing a Keter elevated garden bed.
Once you’ve chosen the right Keter elevated garden bed, it’s time to get started planting!
Before you start planting, you’ll need to prepare your Keter elevated garden bed.
Now your Keter elevated garden bed is ready for planting!
Once your Keter elevated garden bed is prepared, it’s time to start planting.
With a little care and attention, your Keter elevated garden bed will be filled with beautiful plants in no time!
If you’re having trouble with your Keter elevated garden bed, here are a few troubleshooting tips:
With a little care and attention, your Keter elevated garden bed will be a source of fresh, healthy produce for years to come!
In conclusion, knowing how to use a Keter elevated garden bed can transform your gardening experience and bring a host of benefits to your outdoor space. By following the assembly instructions, preparing the soil, and implementing proper watering, fertilization, and maintenance practices, you can create a flourishing garden right in your backyard.
The accessibility of a Keter elevated garden bed eliminates the physical strain associated with traditional gardening, making it easier for everyone to enjoy the pleasures of planting and tending to their green oasis. The improved soil quality and drainage in these beds provide an optimal growing environment for your plants, resulting in healthier growth and increased yields.